Why You'll Love It
- - Quick to assemble and cook, perfect for busy evenings
- - Warm, comforting aroma that fills the kitchen
- - Crispy coating with a creamy, spicy sauce that tingles the palate
- - Versatile—serve as a snack, appetizer, or main dish
*"These skewers are delightfully crunchy and the sauce hits just the right spot—so good!"*
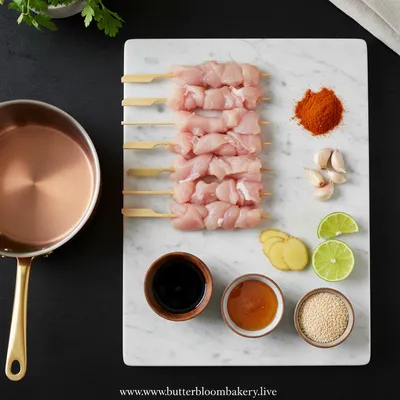
Essential Ingredient Guide
- Chicken breast: Choose fresh, boneless breasts. Pat dry for a crispier coating.
- Panko breadcrumbs: Provides the signature crunch; toast lightly before using.
- Mayonnaise: Creates a luscious base for the sauce; substitute Greek yogurt if desired.
- Sriracha: Adds gentle heat; adjust amount to taste.
- Lime juice: Brightens the sauce and balances the richness.
- Honey: A touch of sweetness rounds out the flavor.
Complete Cooking Process
-
Ingredient Readiness:
Cube the chicken into bite‑size pieces, season lightly, and set up a breading station with flour, egg, and panko.
-
Flavor Development:
Sear the skewered chicken until golden, then coat with the creamy bang‑bang sauce to let flavors meld.
-
Texture Control:
A quick final broil creates that coveted crispy edge without drying the meat.
-
Finishing Touches:
Drizzle extra sauce, sprinkle chopped scallions, and add a pinch of sesame seeds for aroma.
-
Serving Timing:
Serve while hot, letting the heat keep the coating crisp and the sauce velvety.
- Use wooden skewers soaked in water to prevent burning
- Let the chicken rest for five minutes after searing for juicier bites
- Mix the sauce just before serving to keep the texture light
- Add a splash of coconut milk for extra creaminess if you like
Pro Tips
Well, these little tricks can make a big difference. The rested chicken stays tender, and the sauce stays glossy. I’ve found that a quick glance at the oven can save you from a burnt stick—so keep an eye out. Ugh, nothing beats the moment you pull the skewers out and hear that faint crackle from the coating.
The essence of the dish:
A fun fact or historical angle:
Flavor or sensory focus:
You Must Know
- Don’t over‑crowd the pan; batch‑cook for even browning
- Fresh lime juice beats bottled for brightness
- Panko should be toasted for maximum crunch
Frequently Asked Questions
→ Can I use thighs instead of breast?
Yes, boneless thighs work well and stay extra juicy; just adjust cooking time by a minute or two.
→ What if I don’t have panko?
You can pulse regular breadcrumbs for a similar texture, or use crushed cornflakes for extra crunch.
→ Is the sauce spicy?
It has a gentle heat from sriracha; feel free to reduce or omit for a milder version.
→ Can I make this ahead of time?
Prep the chicken and sauce separately; store in the fridge and assemble just before cooking.
→ What side pairs best?
Serve with jasmine rice or a simple cucumber salad to balance the richness.
→ How do I reheat leftovers?
A quick toss in a hot skillet restores crispness without overcooking the chicken.
Chef's Tips
If you prefer a gluten‑free version, use rice flour for the first coating.,The sauce can be made ahead and kept refrigerated for up to 2 days.,For extra flavor, add a pinch of smoked paprika to the flour mix.
Nutrition Facts
per serving
420
Calories
34g
Protein
30g
Carbs
18g
Fat
Taste Profile
A balanced heat with a sweet, creamy finish
Ingredient Substitutions
Don't have an ingredient? Try these alternatives
Adjust cooking time for tofu – press well and sear quickly.
Slightly sweeter, so you may reduce honey.
Recipe Variations
Try these delicious twists on the original
Spicy Version
Add extra sriracha and a pinch of cayenne to the sauce for a bold kick.
Mediterranean Style
Mix chopped olives, feta, and sun‑dried tomatoes into the sauce for a savory twist.
Common Mistakes to Avoid
Learn from others' mistakes for perfect results
- Overcrowding the pan, which steam‑cooks instead of browning.
- Skipping the rest period, leading to dry chicken.
- Using stale panko, resulting in a limp coating.
Meal Prep & Storage
Make Ahead Tips
You can marinate the chicken in the flour‑spice mix for up to 24 hours; keep the sauce chilled and combine just before cooking.
Leftover Ideas
Reheat gently in a skillet over medium heat, adding a splash of oil to revive the crispness.
Perfect Pairings
Serve this with...
Cooking Timeline
Prep ingredients – cube chicken, soak skewers, set up breading stations.
Coat chicken pieces in flour, egg, then panko; thread onto skewers.
Sear skewers in hot skillet until golden brown on all sides.
Whisk together sauce ingredients until smooth.
Toss hot skewers in sauce, then broil briefly for extra crispness.
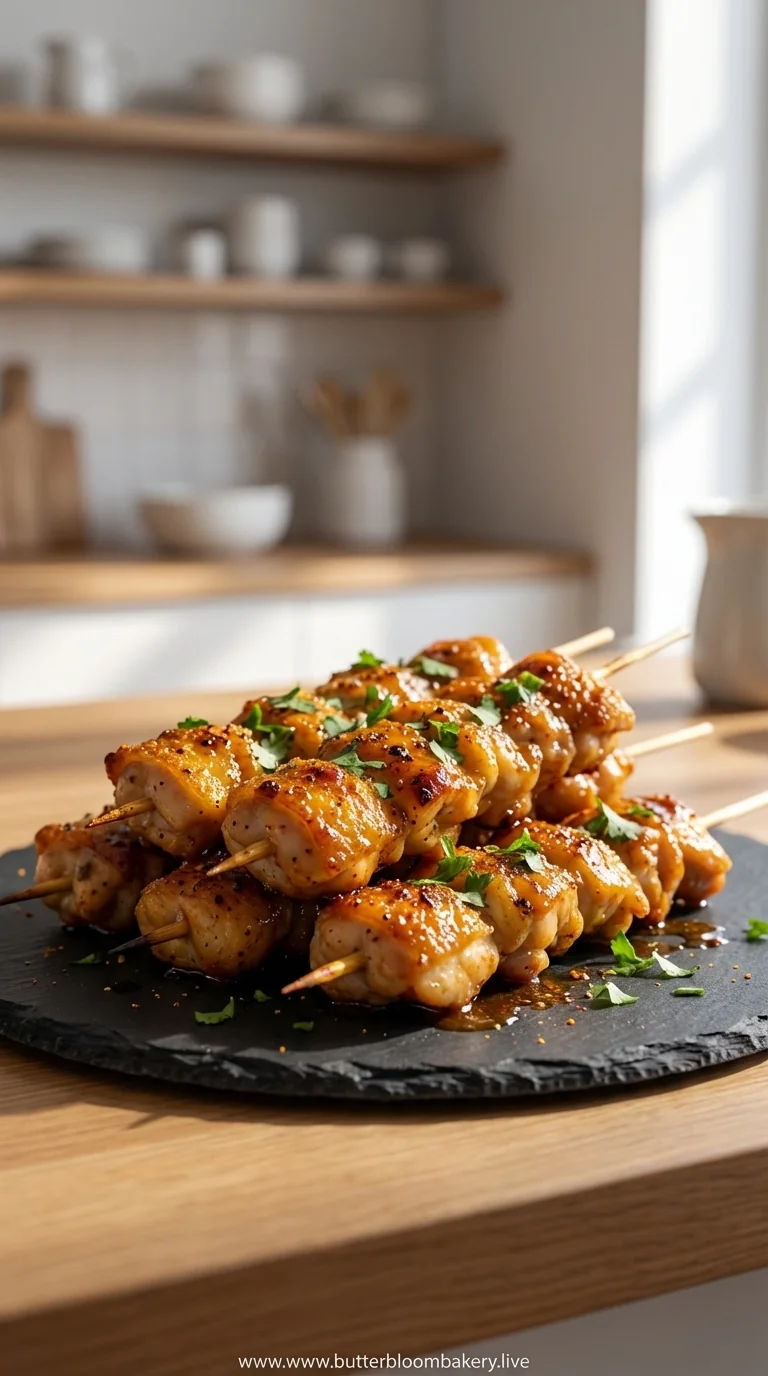
Bang Bang Chicken Skewers
Spicy, crispy bang bang chicken skewers perfect for a quick, tasty dinner that brings a gentle heat and satisfying crunch to the table.
Timing
Prep Time
15 Minutes
Cook Time
20 Minutes
Total Time
35 Minutes
Recipe Details
Ingredients
For the Skewers
- 01 1 lb chicken breast, cut into 1‑inch cubes
- 02 1/2 cup all‑purpose flour
- 03 2 large eggs, beaten
- 04 1 cup panko breadcrumbs
- 05 1 tsp salt
- 06 1/2 tsp black pepper
- 07 Wooden skewers, soaked
Bang‑Bang Sauce
- 01 1/3 cup mayonnaise
- 02 2 tbsp sriracha
- 03 1 tbsp honey
- 04 1 tbsp lime juice
- 05 1 tsp soy sauce
- 06 1 tsp toasted sesame oil
Instructions
Soak the wooden skewers in water for at least 15 minutes to keep them from burning.
Set up three bowls: flour mixed with salt and pepper, beaten eggs, and panko breadcrumbs. Dip each chicken cube first in flour, then egg, then panko, pressing gently to adhere.
Thread the coated chicken onto the skewers, leaving a little space between pieces.
Heat a large skillet over medium‑high heat with a drizzle of oil. Sear the skewers, turning until golden on all sides, about 3‑4 minutes per side.
While the chicken cooks, whisk together all sauce ingredients until smooth; adjust heat by adding more sriracha if you like.
Once the chicken is crisp and cooked through, toss the skewers in the sauce, coating evenly.
Transfer to a baking sheet and broil for 1‑2 minutes to set the coating—watch closely!
Serve immediately, garnished with chopped scallions and a drizzle of extra sauce.
Notes & Tips
- 1 If you prefer a gluten‑free version, use rice flour for the first coating.
- 2 The sauce can be made ahead and kept refrigerated for up to 2 days.
- 3 For extra flavor, add a pinch of smoked paprika to the flour mix.
Tools You'll Need
-
Large skillet
-
Mixing bowls
-
Whisk
-
Wooden skewers
-
Baking sheet
-
Tongs
Must-Know Tips
- Don't overcrowd the pan, cook in batches for even browning
- Let chicken rest briefly after searing, it retains juices
- Taste the sauce as you whisk, adjust sweetness or heat
Professional Secrets
- Room temperature chicken cooks more evenly
- High heat creates that perfect crisp crust
- Tossing the skewers in sauce off the heat keeps them glossy

Recipe by
Amelia HartChef Amelia Hart is a talented cake designer who loves creating beautiful celebration cakes for special moments. She specializes in layered cakes, cre ...
Get Delicious Recipes Weekly
Join 25,000+ home cooks getting our best recipes straight to their inbox.
Free forever • No spam • Unsubscribe anytime